One-stop large format printer parts supplier Printer manufacturer's OEM partner


 January 23,2026
1. Preparations: Push the front paper tray into the body, take off the paper feeder, and stick the transparent top cover to the white case with transparent tape. Tear off the blue adhesive strip at the junction of the upper case (white) and the blue base, taking care that only the seam is exposed, do not tear it off, as it will be used when the printer is restored.
2. Open the inner buckle: At this time, you will see two obvious inner buckles on the back of the printer. Use a small flat screwdriver to push them open, and then push the middle of the two clips along the exposed gap. In this way, all the clips on the back of the printer are uncovered. Be careful to keep the exposed gaps for later operation!
3. Use a small flat screwdriver to slide along the gap to the front of the printer, and you will encounter a total of four inner buckle cards on the left and right sides and the front of the printer, and open them in the same way. In this way, the upper cover of the printer is separated from the base!
4. Pinch the movable paper card at the paper inlet and move it to the left (facing the printer) until it reaches the notch. At this point, it can be easily removed by lifting the top cover upwards.

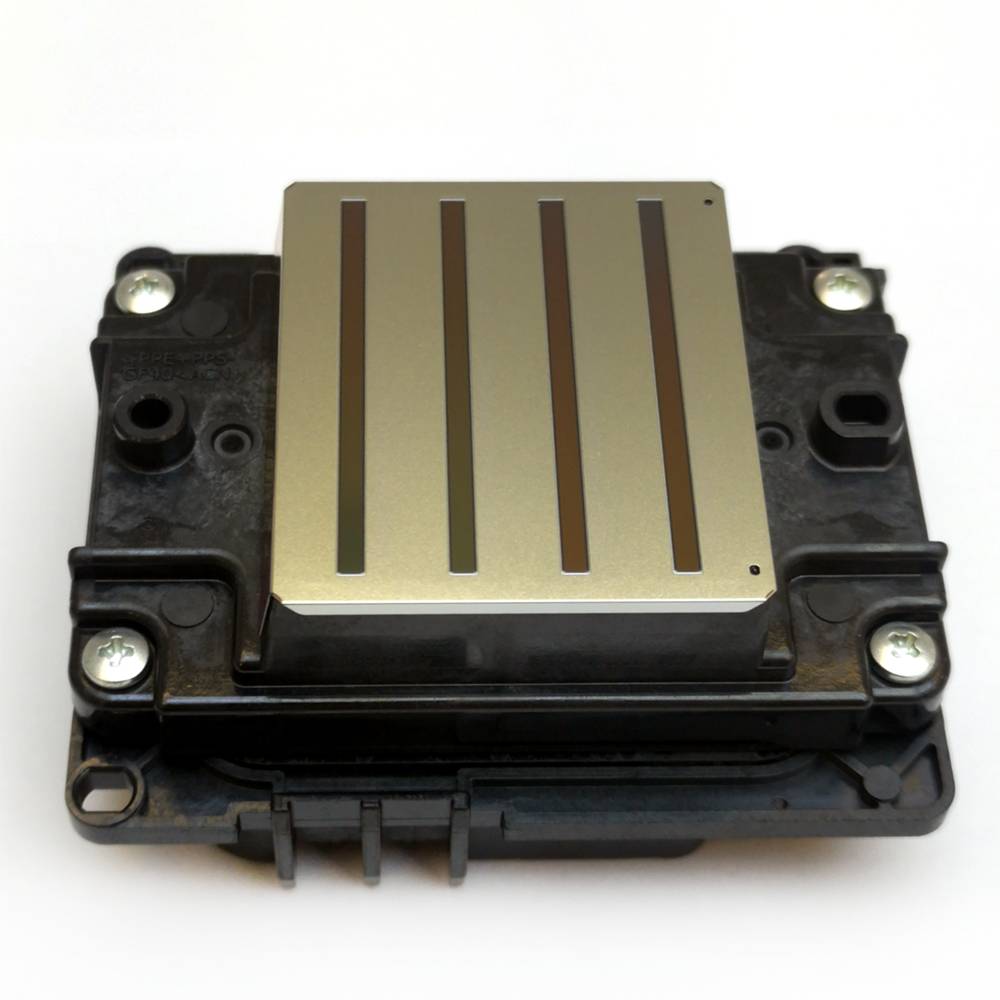
1. Remove the print head: After removing the upper cover of the printer, carefully observe the right side of the print head (facing the printer), and you will find a clip. Use one hand to lightly hold the front compartment of the print head, and the other hand uses a flat Use a small screwdriver to pry the clip lightly. At this time, you will feel that the right side of the front compartment of the print head has moved outward a little.
Pull out the print head connection cable and the ink cartridge monitoring chip cable (the cable needs to be clamped with a tool such as hemostatic forceps) from the socket, and slowly pull out the print head connection cable from the card slot of the circuit board. Below the white cable, you can see another clip on the left side of the print head. Also, use a small screwdriver to pry the clip lightly. At this time, you can separate the front compartment and the rear compartment of the print head by hand. At this time, the print head can also be removed from the track. up and down.
However, we also need to remove the traction rack from the motor gear on the right side of the carriage: use a small flat screwdriver to place it obliquely between the upper part of the gear and the rack, move the rack to the right, and the rack can be moved by the rotation of the gear. Take it off the gears!
2. Disassemble the print head: After removing the print head, just grab the front and rear compartments of the print head with both hands, and apply force in the opposite direction horizontally, the print head can be easily disassembled.

Preparation work: The rear compartment where the nozzles of the C4X series print heads are located also includes the nozzle drive circuit board, so it is necessary to do a good job of protecting the drive circuit board and wrapping the rear half of the compartment with the usual plastic wrap.
Prepare a small flat plate, place the nozzle flat on the plate, and then pour distilled water into the plate to the depth that the nozzle is just partially immersed. Be careful not to splash water on the cable plug and drive circuit board, the first soaking time is about an hour.
Use a plastic tube of a disposable infusion set, one end is inserted into the 5ml syringe, the other end is inserted into the ink inlet hole of the nozzle that needs to be flushed, and the distilled water in the syringe is pressed into the nozzle. Be careful not to put too much pressure to avoid water squeezing. Waterproof isolation glue inside the bad sprinkler. This process needs to be repeated many times until you see a thin jet of water ejecting from each ink outlet. In this way, the clogged nozzles are cleaned and unclogged.
In order to correctly install the cleaned printer nozzle back into the printer, please follow the steps below:
First of all, tear off the plastic wrap, align the front and rear compartments of the nozzle horizontally, and combine the two through the bottom guide post and guide rail, but do not clamp the clips at the left and right ends, otherwise, it will not be able to be installed on the carriage track.
Secondly, insert the cable of the ink cartridge monitoring IC into the socket, then install the nozzle on the printer track, and use a small screwdriver to install the plastic rack on the gear of the carriage motor, but be careful not to damage the rack or gear and pay attention to the rack and the rack. The relative position of the print head to avoid rework!
After completing this, push the nozzle compartment inward, and you will hear "click, click" two sounds, indicating that the nozzle has been installed in place. Push the nozzle left and right with your hand, if it moves freely, it means the printer has been restored. Then plug the other end of the drive cable back into the socket of the drive circuit board. If the print head cannot move freely, perform the operation again. After checking, carefully insert the print head cable back into the cable slot; finally, install the ink cartridge and test the machine with power on. And connect the upper cover of the printer to the base, stick the blue tape, and restore the printer to its original state.
At this point, the correct disassembly and cleaning of the print head of the printer are over.


With 20-year experience in printer parts, Johope has been a professional supplier of original print heads (printheads) and manufacturer of printer ink supply parts, including sub tanks, dampers, filters, ink tubes, which are OEM optional.